First Deployment
Deploy your first application to Nimbuz in minutes. This guide walks you through the process of deploying your application on the Nimbuz platform.
Prerequisites
Before deploying, ensure you have:
- Nimbuz account set up and verified
- Project created with environment configured
- Application code ready to deploy (GitHub, GitLab, or ZIP file)
Accessing Deployments
You have two ways to access the deployments page:
Option A: Click Proceed
- Choose your project
- Click the Proceed button at the bottom right of the Projects page
Option B: Navigate to Deployments
- From the sidebar on the left, navigate to Deployments
Both options will take you to the same Deployments page

Create New Deployment
Click "+ New Deploy" button on the right side of the Deployments screen.
Choose Deployment Type
Click the dropdown labeled "Choose a type to continue."
You have three deployment options based on where your codebase is hosted:
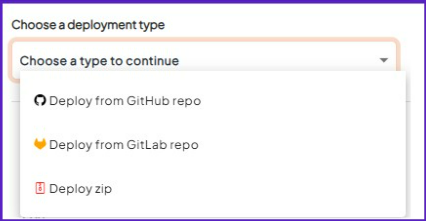
- Deploy from GitHub repo
- Deploy from GitLab repo
- Deploy zip
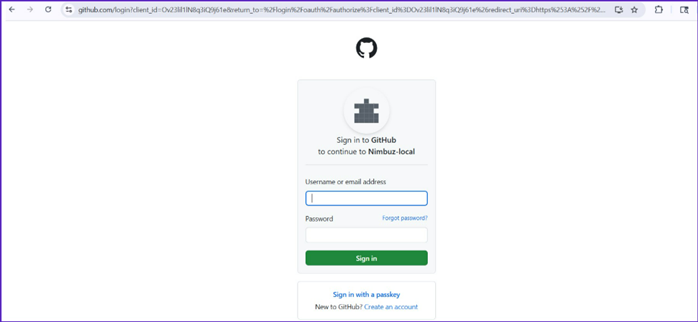
Deploy from GitHub Repository
Enter your GitHub credentials to connect to your GitHub account. After authorizing Nimbuz, your branches and repositories will be loaded automatically.
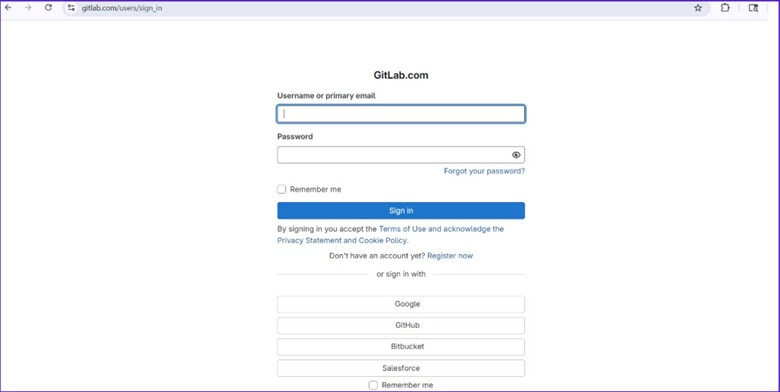
Deploy from GitLab Repository
Enter your GitLab credentials to connect to your GitLab account. After authorizing Nimbuz, your branches and repositories will be loaded automatically.
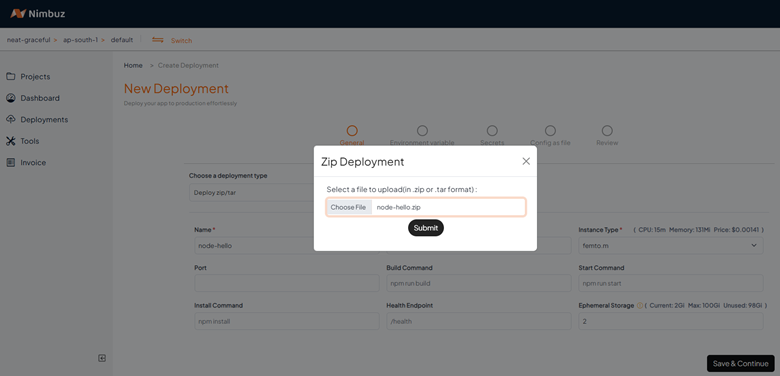
Deploy from ZIP/TAR
Browse and select ZIP or TAR file (maximum size: 500 MB) from local device. Then, click Submit.
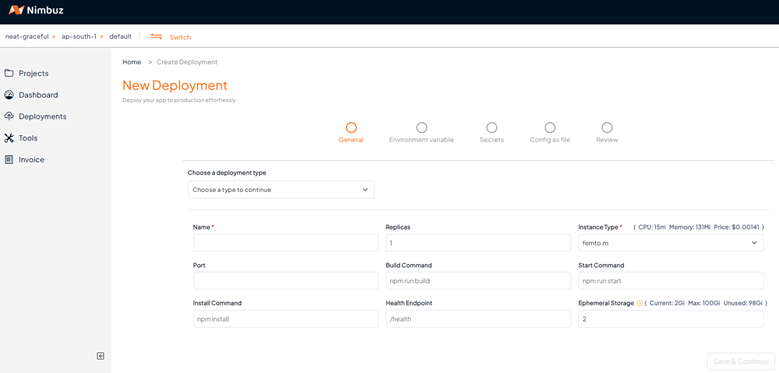
Deployment Parameters - General
After selecting one of the repository options mentioned above, fill in the following details:
-
Name (required): Usually auto populated. Must contain only lowercase letters, numbers, and separators (., -). Uppercase letters and consecutive separators are not allowed.
-
Replicas: The number of instances you want to run (e.g., 1).
-
Port: The port your application listens on (e.g., 3000). Leave blank to use the default.
-
Build Command: The command to build your project (e.g., npm run build).
-
Start Command: The command to start your application (e.g., npm run start).
-
Install Command: The command to install dependencies (e.g., npm install). EXPOSE 3000 CMD ["npm", "start"]
#### Step 2: Deploy Container

1. Go to dashboard and click **"New Project"**
2. Select **"Deploy Container"**
3. Provide your container image URL
4. Configure port and environment variables
5. Click **"Deploy"**

## Supported Application Types

### Static Sites

Perfect for:

- React, Vue, Angular applications
- Static site generators (Gatsby, Next.js, Nuxt.js)
- HTML/CSS/JavaScript sites

**Example Configuration:**

- Build Command: `npm run build`
- Output Directory: `dist` or `build`
- Node Version: 18.x

### Backend APIs

Ideal for:

- REST APIs
- GraphQL servers
- Microservices

**Example Configuration:**

- Start Command: `npm start`
- Port: 3000 (or your app's port)
- Health Check: `/health` endpoint

### Full-Stack Applications

Deploy complete applications:

- Next.js applications
- Nuxt.js applications
- Express.js with frontend

**Example Configuration:**

- Build Command: `npm run build`
- Start Command: `npm start`
- Port: 3000

## Environment Configuration

### Environment Variables

Add environment variables for your application:

1. Go to **Project Settings** → **Environment Variables**
2. Add key-value pairs
3. Mark sensitive variables as "Secret"
4. Redeploy your application

Common environment variables:

```bash
NODE_ENV=production
DATABASE_URL=your-database-url
API_KEY=your-api-key
PORT=3000
Custom Domains
Connect your custom domain:
- Go to Project Settings → Domains
- Click "Add Domain"
- Enter your domain name
- Follow DNS configuration instructions
- SSL certificate is automatically provisioned
Database Setup
Add a database to your application:
PostgreSQL Database
- Go to Resources → Databases
- Click "Create Database"
- Select PostgreSQL
- Choose your plan and region
- Database connection details will be provided
MongoDB Database
- Select MongoDB from database options
- Configure cluster size and region
- Get connection string for your application
Redis Cache
- Select Redis for caching needs
- Configure memory size
- Use for sessions, caching, or queues
Monitoring Your Deployment
Build Logs
Monitor your deployment:
- Real-time build logs during deployment
- Error messages and warnings
- Build duration and optimization tips
Application Logs
View runtime logs:
- Go to Project → Logs
- Filter by log level (error, warn, info)
- Search specific log messages
- Export logs for analysis
Performance Metrics
Track application performance:
- Response times
- Request volume
- Error rates
- Resource usage
Scaling Your Application
Automatic Scaling
Nimbuz automatically scales based on traffic:
- Scale Up: More instances during high traffic
- Scale Down: Fewer instances during low traffic
- Custom Metrics: Scale based on specific metrics
Manual Scaling
Override automatic scaling:
- Go to Project Settings → Scaling
- Set minimum and maximum instances
- Configure scaling triggers
- Apply changes
Common Deployment Issues
Build Failures
Node.js Version Mismatch
# Specify Node.js version in package.json
{
  "engines": {
    "node": "18.x"
  }
}
Missing Dependencies
- Ensure all dependencies are in
package.json - Check for missing environment variables
- Verify build commands are correct
Runtime Errors
Port Configuration
// Use environment port or default
const PORT = process.env.PORT || 3000;
app.listen(PORT, () => {
  console.log(`Server running on port ${PORT}`);
});
Database Connection Issues
- Verify database connection string
- Check network connectivity
- Ensure database is accessible from Nimbuz
Best Practices
Performance Optimization
- Use build optimization flags
- Enable gzip compression
- Optimize images and assets
- Implement caching strategies
Security
- Use environment variables for secrets
- Enable HTTPS (automatic with custom domains)
- Implement proper authentication
- Regular security updates
Monitoring
- Set up health checks
- Configure alerting
- Monitor application metrics
- Log important events
Next Steps
Congratulations on your first deployment! Now you can:
- Set up monitoring and alerts
- Configure custom domains
- Learn about resource management
- Explore advanced features
Getting Help
Need assistance with deployment?
- Check our troubleshooting guide
- Ask in our community forum
- Contact support: support@nimbuz.cloud
- Watch our deployment tutorials